

今天教大家直接在自己的linux上部署一个免费开源的消息推送服务器『Gotify』,消息推送纯粹,并且还没有次数限制,同时它也支持非常多的应用推送服务,一次部署永久使用,还是值得一试的。
官网贴在这:https://gotify.net (全英文的)
Gotify是一个极简的免费开源消息推送服务器,它基于Websocket协议,可以轻松集成到任何具有HTTP客户端能力的平台上,如Web应用、移动应用或物联网设备。
它的特性如下:
轻量级:由于其简单的架构和小体积,Gotify 在资源有限的环境中也能运行良好。
可扩展:通过插件系统可以方便地增加新功能,满足各种定制需求。
跨平台:支持多种操作系统,包括 Linux, macOS 和 Windows。
易部署:提供一键安装脚本和Docker镜像,快速部署到本地或云端。
社区活跃:有一个积极的开发者社区,持续维护和更新项目。
它的使用场景如下:
开发工具:开发人员可以将 Gotify 作为构建/测试通知的服务,当代码构建成功或失败时,自动发送消息到开发者的手机或电脑。
服务器监控:与Prometheus、Grafana等监控工具配合,Gotify 可以在出现性能问题或者警报时立即通知运维人员。
物联网应用:实时推送设备状态更新或警告信息,提高响应速度。
个人任务管理:创建自己的提醒服务,比如待办事项、日程提醒等。
企业通讯:小型团队可以用它构建内部的通知系统,替代传统邮件或IM。
Gotify,一个采用Go语言构建的开源消息推送服务,凭借其高效能和跨平台特性,在性能上脱颖而出,并能在众多操作系统上稳定运行。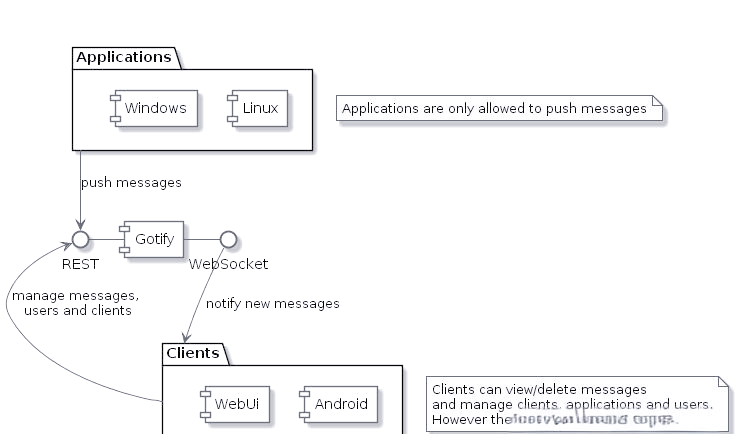
Gotify提供了多端支持,包括自带WebUI的服务器端、Android端以及命令行工具。用户既可以通过网页端轻松接收和管理消息,也可以在Android设备上安装应用程序来接收推送,适应不同使用场景。目前,官方尚未推出iOS端应用。
在消息推送与接收方面,Gotify支持简单的REST API控制,用户可在应用中创建“应用”来推送消息。而“客户端”则包括网页端和手机端,支持更改设置、推送和阅读消息。
此外,Gotify还支持text文本和markdown文本两种消息格式,满足用户的不同推送需求。同时,它提供了优先级设置功能,数值越大,消息提醒优先级越高,Android端提醒越显著,助力用户区分不同重要程度的消息。
官方提供了docker命令,只需简单几步即可快速启动服务:
docker run -p 80:80 -v /var/gotify/data:/app/data gotify/server
默认用户名密码为:admin/admin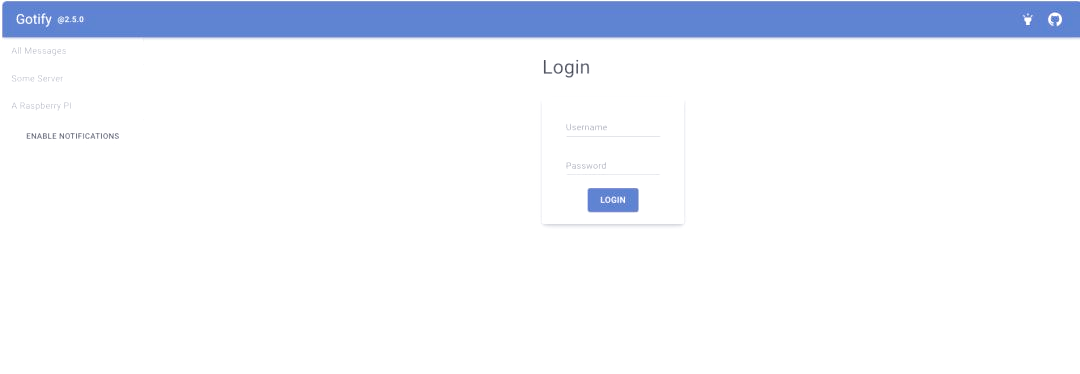
首次登录后,用户需要创建一个应用程序,类似于创建一个分类。通过向不同的应用程序推送消息,可以实现消息的分类展示。这样,用户可以根据自己的需求,将不同类型的消息推送到不同的分类中,从而实现对消息的有效管理和展示。
对于安卓用户,您可以前往谷歌商店或Github下载最新版本的客户端。在Github中,您可以找到以下链接:
请根据您的需求选择合适的下载方式,并确保您的设备已满足相关系统要求。安装完成后,您将能够享受推送测试与分类创建的便捷服务。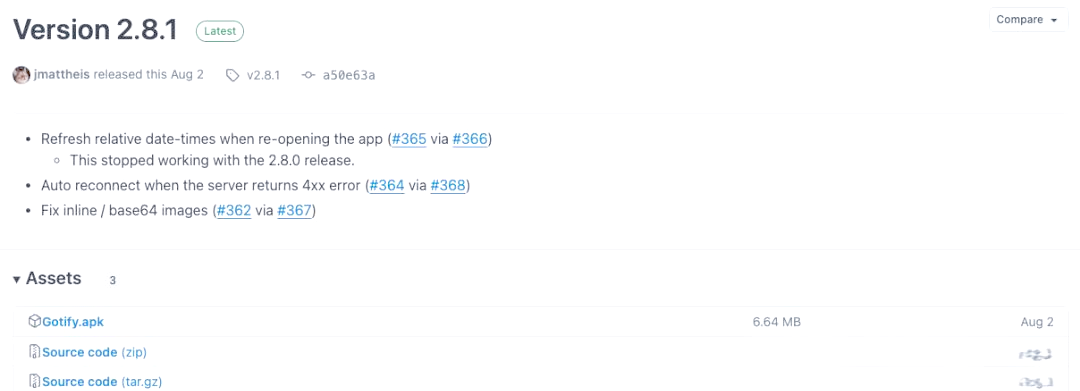
安装完客户端后,接下来需要配置Gotify服务器的地址。配置完成后,输入您的平台用户名和密码进行登录,即可完成设备的注册与使用。
消息推送的格式如下:
# POST请求http://gotify平台地址/message?token=APPS中分类token# Body 数据{"title": "消息标题","message": "消息内容","priority": 0 # 消息等级}
快捷测试示例:
curl "https://push.example.de/message?token=ABCD"; -F "title=告警" -F "message=您有一个设备离线。" -F "priority=5"要深入了解更多用法,请查阅以下文档:https://gotify.net/docs/msgextras
安装方法二、使用2进制文件安装,并修改默认端口。
1.下载对应的版本,我选择当前最新版本2.6.1 下载地址:https://github.com/gotify/server/releases
我的是amd64,所以我的下载地址是:
sudo wget https://github.com/gotify/server/releases/download/v2.6.1/gotify-linux-amd64.zip
2.解压
sudo unzip gotify-linux-amd64.zip
3.给写入权限
chmod +x gotify-linux-amd64
4.修改服务端默认端口80,需要下载配置文件。第四行的80端口改成你要的。
你也可以从官网下载配置文件地址如下:
sudo wget -O config.yml https://raw.githubusercontent.com/gotify/server/master/config.example.yml
下面是我贴出来的配置文件,
server:
  keepaliveperiodseconds: 0 # 0 = use Go default (15s); -1 = disable keepalive; set the interval in which keepalive packets will be sent. Only change this value if you know what you are doing.
  listenaddr: '' # the address to bind on, leave empty to bind on all addresses. Prefix with "unix:" to create a unix socket. Example: "unix:/tmp/gotify.sock".
  port: 80 # the port the HTTP server will listen on这就是端口配置

  ssl:
    enabled: false # if https should be enabled
    redirecttohttps: true # redirect to https if site is accessed by http
    listenaddr: '' # the address to bind on, leave empty to bind on all addresses. Prefix with "unix:" to create a unix socket. Example: "unix:/tmp/gotify.sock".
    port: 443 # the https port
    certfile: # the cert file (leave empty when using letsencrypt)
    certkey: # the cert key (leave empty when using letsencrypt)
    letsencrypt:
      enabled: false # if the certificate should be requested from letsencrypt
      accepttos: false # if you accept the tos from letsencrypt
      cache: data/certs # the directory of the cache from letsencrypt
      hosts: # the hosts for which letsencrypt should request certificates
  #     - mydomain.tld
  #     - myotherdomain.tld
  responseheaders: # response headers are added to every response (default: none)
  # X-Custom-Header: "custom value"
  trustedproxies: # IPs or IP ranges of trusted proxies. Used to obtain the remote ip via the X-Forwarded-For header. (configure 127.0.0.1 to trust sockets)
  #   - 127.0.0.1
  #   - 192.168.178.0/24
  #   - ::1

  cors: # Sets cors headers only when needed and provides support for multiple allowed origins. Overrides Access-Control-* Headers in response headers.
    alloworigins:
    # - ".+.example.com"
    # - "otherdomain.com"
    allowmethods:
    # - "GET"
    # - "POST"
    allowheaders:
  #   - "Authorization"
  #   - "content-type"

  stream:
    pingperiodseconds: 45 # the interval in which websocket pings will be sent. Only change this value if you know what you are doing.
    allowedorigins: # allowed origins for websocket connections (same origin is always allowed, default only same origin)
#     - ".+.example.com"
#     - "otherdomain.com"
database: # see below
  dialect: sqlite3
  connection: data/gotify.db
defaultuser: # on database creation, gotify creates an admin user (these values will only be used for the first start, if you want to edit the user after the first start use the WebUI)
  name: admin # the username of the default user
  pass: admin # the password of the default user
passstrength: 10 # the bcrypt password strength (higher = better but also slower)
uploadedimagesdir: data/images # the directory for storing uploaded images
pluginsdir: data/plugins # the directory where plugin resides (leave empty to disable plugins)
registration: false # enable registrations
5.配资开机启动
5.1配置文件名称gotify.service
[Unit]
Description=Gotify
Requires=network.target
After=network.target

[Service]
Type=simple
User=root
WorkingDirectory=/opt/gotify
ExecStart=/opt/gotify/gotify
StandardOutput=append:/var/log/gotify/gotify.log
StandardError=append:/var/log/gotify/gotify-error.log
Restart=always
RestartSec=3

[Install]
WantedBy=multi-user.target把文件写入/etc/systemd/system/gotify.service
保存完毕后,更新配置,设置启动
sudo systemctl daemon-reload
sudo systemctl enable gotify
sudo systemctl start gotify
 渝公网安备50022202000470
渝ICP备2023013153号-1 Powered by qibosoft X1.0 Code ©2003-2020
渝公网安备50022202000470
渝ICP备2023013153号-1 Powered by qibosoft X1.0 Code ©2003-2020
 网络攻城狮
网络攻城狮